


Please watch this video for a detailed walkthrough of these steps. They are written out below to save you from taking notes!
Step 1. Set up certificate template in Google Slides or Docs

- In Google Docs or Google slides, edit your certificate to fit your needs. Use the <<tag>> format for areas that will be auto-completed.
- These tags will tell the autocrat addon where to place the form information in the certificate
Step 2. Set up the Google Form
- Once you set up your template which is a google doc or google slides document, the next thing that you need is a form that people are going to fill out for you to gather their information.
- Go to File > Select New > Select Google Forms

- Use the interface to add questions e.g (first name, last name and email address). Email address is essential in order to send them the completed certificate.

You can have as many questions in your form as not all of the form information is going to end up in your certificate, you can pick and choose which of these form fields will end up in your final document.
Modify your form’s responses settings by creating a spreadsheet. As soon as someone fills out the form, you can view the information on a spreadsheet. To generate the spreadsheet, follow these steps:
Click on the Responses tab > Click on the green button to create spreadsheet > Select the create a new spreadsheet option > Edit the name then click create.
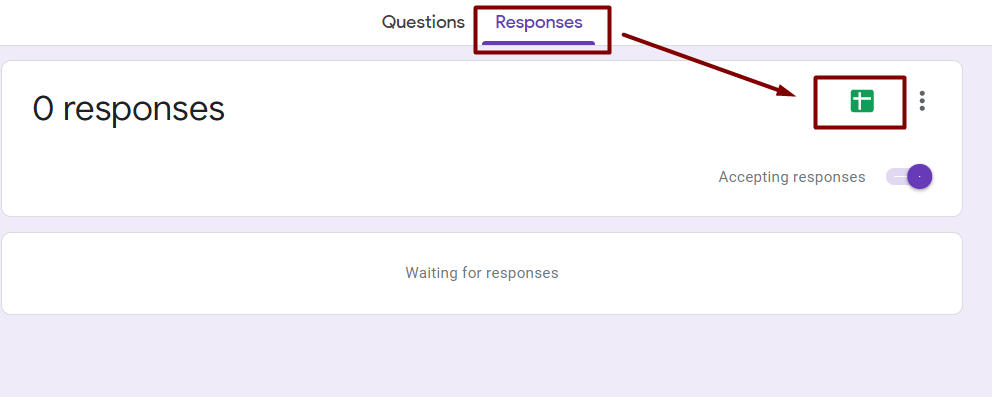
The newly created sheet should have automatically opened in a new tab.
Step 3. Install AutoCrat add-on
- The way to get the information from the spreadsheet into the template is through AutoCrat add-on.
From the spreadsheet click on Add-ons > Click get add-ons > Google Marketplace will open > Search AutoCrat > Select Autocrat > Click the install button

- After installing, an AutoCrat window should be displayed. Click New Job to create a new merge job.

Name your new job > Click Next > Click on from drive to select the certificate template > Choose your certificate template > Click select > Click next to continue.
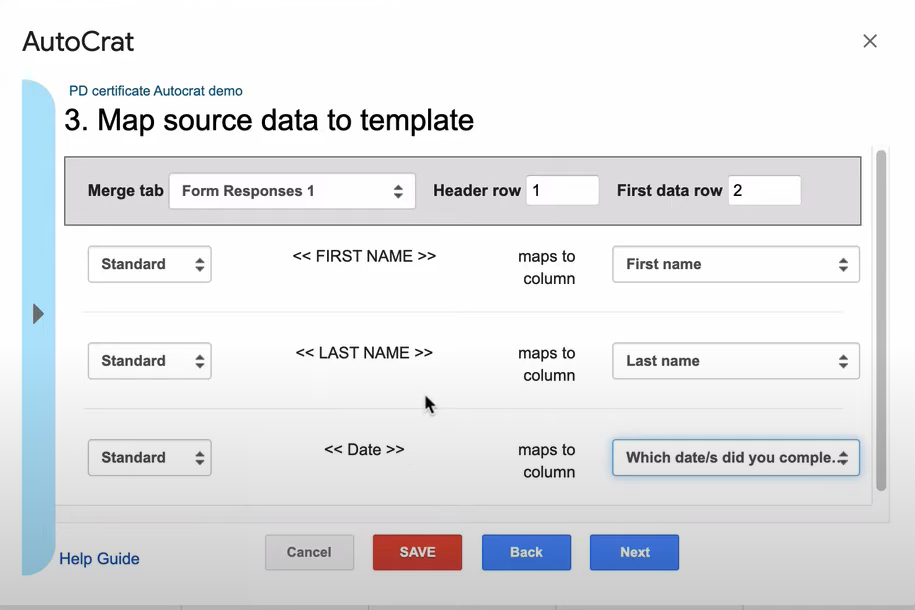
- You will now match the tags in your certificate to columns in your spreadsheet.
- Use the dropdown windows to select the proper column for each tag, then click Next.
- Name your file and select the type of document it will produce.
- For the Output as field, select Multiple output mode so each person gets their own document, rather than a single document with many pages that only you get.

- You will now decide how the certificates will be sent to recipients.
The following settings are recommended:
Share doc? – Yes
Share doc as – PDF
Allow collaborators to re-share – Yes
Send from generic no-reply address – No

Email Template Set up:
To: Use the blue bar to copy & paste the email address tag
Cc:
Bcc:
Reply To:
Type in Subject: Type a message

- When you are finished, click Next.
- Run Form on trigger if you would like certificates to be generated automatically on form submission.
Select Yes > Select No > Then click save to finish creating your merge job.
Step 4. Test your merge job
- You can fill out the form and submit it to test your automation process.
- Immediately after submitting the form, you should see a new row in the Responses spreadsheet.
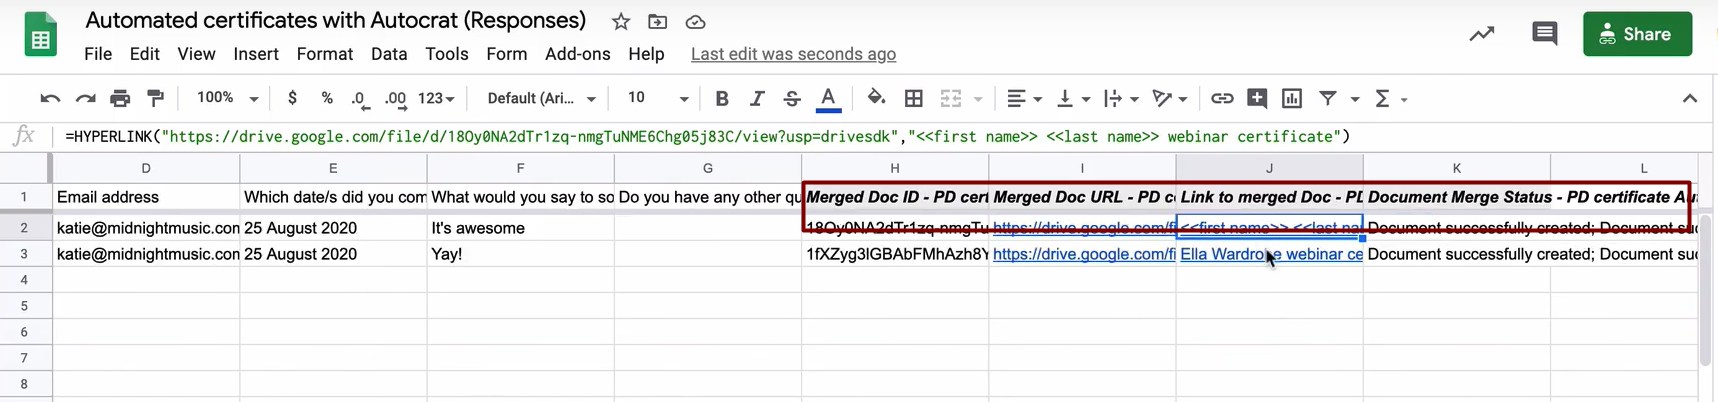
- To edit :
Click on add ons > Select AutoCrat > Click on the pencil button > Make the edit > SAVE

That’s it! I hope you find this technique useful. It’s certainly saved me LOADS of time over the years and it’s so useful to be able to create a personalised certificate for students or colleagues.
Download your copy
Would you like to take a copy of these instructions with you? Click the button below and a copy of this will be sent directly into your inbox.
Looking for More Resources for Music Teachers?
Hello! I’m Katie Argyle – an Australian music technology trainer and consultant with a passion for helping music teachers through my business Midnight Music.
I’m a qualified teacher but no, I don’t currently teach in a school. I help teachers through my online professional development space – the Midnight Music Community – where there are tutorial videos, courses, links and downloadable resources.

I like to focus on easy ways to incorporate technology into what you are already doing in your music curriculum through a range of creative projects. I also run live workshops and have presented at countless conferences and other music education events.
If you want simple, effective ideas for using technology in music education, I would LOVE to help you inside the Midnight Music Community.




4 Comments
Brilliant, free option, thank you for explaining. It works perfectly. Screenshots are brilliant, but it would have been even better if you would have included every single step.
Best regards
Michelle – there is an entire walkthrough video at the top of the page showing each step. Not sure if you missed that?
This works great! I just have one question: I’m using a single field to to fill in tags on my certificate, but I need one instance of the tag to be all caps, and the other instance to be as written in the column. Is there anyway for me able to do that? Thanks in advance!
Apologies – a belated reply! I’m not really sure. I’d guess that it would be better to separate the all caps into a different field and then look into whether the spreadsheet can force that field to always display all caps. Hopefully I’ve understood what you meant!